Configure the server to be under CMM Management
If the server is not currently managed by CMM, enable CMM management of it:
-
Log in to your CMM account.
-
On the Servers screen (where you will land by default after logging in), click on the Manage link for the server.

The Server screen will refresh and the Manage link will be replaced by the Edit button
 and Schedule button
  .
.In the Scheduled column of the table it should now say “on demand”.
Once a server is under CMM Management, the server’s Elastic IP address (if it has one) and the type of server (Amazon instance type) are automatically detected. You can also add a server description to give additional details of the server.
These can be reviewed and updated by doing the following:
-
Log in to your CMM account.
-
On the Servers screen, click on the Edit button
for the server – this will take you to the Identity tab of the Edit Server screen. The Elastic IP address and Amazon Type settings are found in the Network Identity section.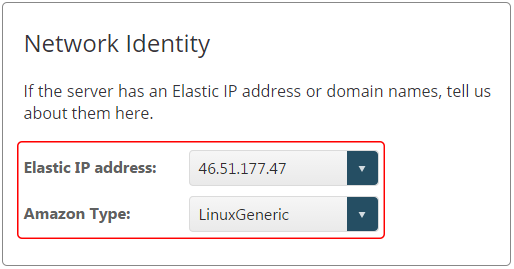
-
If the server has more than one elastic IP address assigned to it in Amazon, they will appear in the drop down menu. Simply choose the one that you want to use.
-
Click Save if any changes have been made.